Welcome to The Hand Lettering Forum!
This is an interactive Bulletin Board on the topics of Sign making, design, fabrication, History, old Books and of coarse Letterheads, Keepers of the craft. The Hand Lettering Forum features links to resources, sign art history, techniques, and artists profiles. Learn more about Letterheads at https://theletterheads.com. Below you'll see Mchat has been added as a live communication portal for trial, and the Main forum Links are listed below.

DIY Chrome kit

Hand Lettering topics: Sign Making, Design, Fabrication, Letterheads, Sign Books.

Moderators: Ron Percell, Mike Jackson, Danny Baronian

Post Reply
Ismael Alvarado
Posts: 130
Joined: Mon Jan 11, 2010 10:00 pm

DIY Chrome kit

Post by Ismael Alvarado »

Ok guys I will be writing this How to with the purpose of leading the people interested in this subject to a starting point, by no means this is a definitive and clear cut way, as I have search and search for answers my self on the web for this, I have search chemicals forum like this, automotive forums and anything that could get me close to what I wanted without asking: How do I build a Spray On Chrome System on the Cheap? because many will think I am crazy and that it can't be done...

so here it is: my first advice is if you have the money just buy the least expensive kit from Alsa its about 1500$ but only covers 100sq/f but if you are on a tight budget my best advice would be to buy the Silver Spray Kit that mrs King sells and also buy the 500sq/f silvering chemicals....but you will need to try different paints to see which will work and which will not,it takes time and a lot of patience..

and if you are on a shoe string budget like I was, there is no other way than to build it your self...I build a dual spray gun by using 2 cheap(10$) chinesse detail guns, I will post pics when I have the chance, on the silver nitrate side of the gun I replace the cup, needle and a few other parts with stainless steel which I made my self, as for the chemicals, I still use mrs king chemicals, but I mix them different..

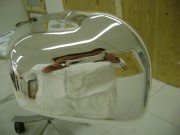
for the paint I use minwax high gloss fast drying polyurethane for my base coat prep, and a cured 2k Polyurethane clear coat on top of the silver...
Why Minwax wood polyurethane? I have found that it once dried it does not interact with my final clearcoat and it wets nice also...2K poly does not wet as nice..


Now for the brave of heart....DIY PermaStar Chrome:
http://www.goodrichtechnology.com/

I also want to try this on wheels rims , so I bought my self a PowderCoating kit(69 dollars) and Clear Powder Coat...

this in my head should work, but have not tried it yet... :wink:

Ok now its time for you mad scientist to start working... :lol:
Patrick Mackle
Posts: 478
Joined: Thu Apr 08, 2004 10:21 am
Location: Monrovia, Ca.
Contact:

Re: DIY Chrome kit

Post by Patrick Mackle »

Are you planning to mimic traditional chrome plating by substituting silvering and then protecting it with clear powder coating?
If this is the case, I think that you will have to be able to apply a very smooth powder coat finish, and from my experience the very nature of the
powder heat cure finish makes makes it crawl together for a fairly ugly orange peel surface. The smoothest and best OEM wheel clear coats appear to be
two part spray coated polyurethanes. But as you know probably well know, coatings change almost daily it seems to keep up with the EPA, so what used to work can change fast.
Ideally you need to find several silver friendly base coats that will bond to your intended range of surface materials (plastic, leather, wood, resins, ferrous and non ferrous metals) and accept the tinning process, then the silver without tarnishing from that point on. Then you need to find an absolutely clear top coat that also will continue to leave the silver in it's bright and perfect state.
Lacquer coatings are probably the least problematic by nature, while most petrochemical based paint formulations may contain slight sulphur traces to eventually cause tarnishing corrosion on the silver.
In my experience of silver on non glass surfaces, it would be good to dilute the silver concentration to keep the deposit thin, because as the silver deposits thicker, micro nodules appear to grow in varying amounts and as this continues the perfect mirror deposition begins to dull down into a matte silver with even heavier areas of white to creamy yellow.
This does not affect a mirror because through the glass you can only see the initial formation, but in your case when you see the top surface, too much silver can dull the reflective surface.
I have long known about silvering on other materials, but working out exactly which currently available silver friendly materials will work well has never arisen till now. Now, I will be thinking about this, along with about 20 million other things in my mind.
More later,
Pat
Ismael Alvarado
Posts: 130
Joined: Mon Jan 11, 2010 10:00 pm

Re: DIY Chrome kit

Post by Ismael Alvarado »

Patrick Mackle wrote:Are you planning to mimic traditional chrome plating by substituting silvering and then protecting it with clear powder coating?

Patrick Mackle wrote: If this is the case, I think that you will have to be able to apply a very smooth powder coat finish, and from my experience the very nature of the
powder heat cure finish makes makes it crawl together for a fairly ugly orange peel surface. The smoothest and best OEM wheel clear coats appear to be
two part spray coated polyurethanes.

well that's my idea for aluminum car wheel rims, but I guess 2k poly could work also,
Patrick Mackle wrote: Then you need to find an absolutely clear top coat that also will continue to leave the silver in it's bright and perfect state.
Lacquer coatings are probably the least problematic by nature, while most petrochemical based paint formulations may contain slight sulphur traces to eventually cause tarnishing corrosion on the silver.
I am still struggling with this, but I have not given up yet, I also tried permalac lacquer but as soon as it makes contact with the silver it makes the silver gold yellow(which I could use in the future if the customer wants a gold tone. :) ) and I don't like the durability of lacquers, at this moment I am working with a 2K Polyurethane clearcoat that seems to work much better and I mix it with just a pinch of blue to hide the small yellow hue...
Patrick Mackle wrote: In my experience of silver on non glass surfaces, it would be good to dilute the silver concentration to keep the deposit thin, because as the silver deposits thicker, micro nodules appear to grow in varying amounts and as this continues the perfect mirror deposition begins to dull down into a matte silver with even heavier areas of white to creamy yellow.
thank you sir, I learned that the hard way..now I use a very dilute concentration and works like a charm
Patrick Mackle wrote: Now, I will be thinking about this, along with about 20 million other things in my mind.
More later
... That's our nature Sir and I love it and if I can't get rid of that small yellow hue, this could make one nice base coat for candies, as the mirror effects shine through the candy paint, I can make it red, blue, gold and all the colors one can think of... :mrgreen:
erik winkler
Posts: 1097
Joined: Sat Feb 23, 2008 5:48 pm
Location: Amsterdam Netherlands
Contact:

Re: DIY Chrome kit

Post by erik winkler »

Patrick Mackle wrote: In my experience of silver on non glass surfaces, it would be good to dilute the silver concentration to keep the deposit thin, because as the silver deposits thicker, micro nodules appear to grow in varying amounts and as this continues the perfect mirror deposition begins to dull down into a matte silver with even heavier areas of white to creamy yellow.
thank you sir, I learned that the hard way..now I use a very dilute concentration and works like a charm

Would this mean that you thin the concentration of the reducer as well?

Ismael,
I do not understand why with your tests the hue will transform in a yellowish color...
When Peacock has no problems at all.
http://www.pchrome.com/products.htm
Did you use the Permalac 2KA with the Permalac 2KB?

Erik
Realizing we are in the 2nd renaissance of the arts.
Learn, copy and trying to improve...
Still in the learning phase ;-)
Amsterdam Netherlands
www.ferrywinkler.nl
www.schitterend.eu
www.facebook.com/Schitterend.eu
Ismael Alvarado
Posts: 130
Joined: Mon Jan 11, 2010 10:00 pm

Re: DIY Chrome kit

Post by Ismael Alvarado »

erikwinkler wrote: Would this mean that you thin the concentration of the reducer as well?
No, actually I kept it the same... :o
erikwinkler wrote: Ismael,
I do not understand why with your tests the hue will transform in a yellowish color...
When Peacock has no problems at all.
http://www.pchrome.com/products.htm
Did you use the Permalac 2KA with the Permalac 2KB?
[/quote][/quote]

No I just used normal uncured permalac. and I will not be using it or Mrs King's product as the price of bringing everything from the USA double...I will be using my own silvering chemicals and I have to find my own Clear coat too...

you guys are luck you have things so much cheaper... :mrgreen:
erik winkler
Posts: 1097
Joined: Sat Feb 23, 2008 5:48 pm
Location: Amsterdam Netherlands
Contact:

Re: DIY Chrome kit

Post by erik winkler »

Shipping to Nederland (Europe) is even more!
Realizing we are in the 2nd renaissance of the arts.
Learn, copy and trying to improve...
Still in the learning phase ;-)
Amsterdam Netherlands
www.ferrywinkler.nl
www.schitterend.eu
www.facebook.com/Schitterend.eu
Ismael Alvarado
Posts: 130
Joined: Mon Jan 11, 2010 10:00 pm

Re: DIY Chrome kit

Post by Ismael Alvarado »

erikwinkler wrote:Shipping to Nederland (Europe) is even more!
I bet...but you guys earn Euros and I earn Cordobas(21 Cordobas = 1 dollar) and I have a very limited budgect... :(
erik winkler
Posts: 1097
Joined: Sat Feb 23, 2008 5:48 pm
Location: Amsterdam Netherlands
Contact:

Re: DIY Chrome kit

Post by erik winkler »

Ismael, you are right, but if you are broke you are broke.
No matter in what currency :wink:
Realizing we are in the 2nd renaissance of the arts.
Learn, copy and trying to improve...
Still in the learning phase ;-)
Amsterdam Netherlands
www.ferrywinkler.nl
www.schitterend.eu
www.facebook.com/Schitterend.eu
Ismael Alvarado
Posts: 130
Joined: Mon Jan 11, 2010 10:00 pm

Re: DIY Chrome kit

Post by Ismael Alvarado »

erikwinkler wrote:Ismael, you are right, but if you are broke you are broke.
No matter in what currency :wink:
I am not broke buddy, I just work with a limited budget of 500 dollars a month, to you that might be not much but in nicaragua that is having a good job....anyways this kit is for the limited budget people and if you can aford the alsa or the peacock labs kit goa ahead it will save you a lot of headaches
erik winkler
Posts: 1097
Joined: Sat Feb 23, 2008 5:48 pm
Location: Amsterdam Netherlands
Contact:

Re: DIY Chrome kit

Post by erik winkler »

quote] I am not broke buddy[/quote]

I was talking about my own budget at the moment :wink:
Realizing we are in the 2nd renaissance of the arts.
Learn, copy and trying to improve...
Still in the learning phase ;-)
Amsterdam Netherlands
www.ferrywinkler.nl
www.schitterend.eu
www.facebook.com/Schitterend.eu
Ismael Alvarado
Posts: 130
Joined: Mon Jan 11, 2010 10:00 pm

Re: DIY Chrome kit

Post by Ismael Alvarado »

erikwinkler wrote:quote] I am not broke buddy
I was talking about my own budget at the moment :wink:[/quote]
Ok... :lol: I thought it was me...sorry, but why dont you make your own silvering chemicals. :?:

hey I fixed the yellowing hue..now I have shiny silver after clearing it, I was not cleaning it enough after silvering and I did not allowed the 24 hour drying time it required, but now I do so everything is just fine.....I am still working with a 2 parts Polyurethane ClearCoat to have that super durability :mrgreen:
Ismael Alvarado
Posts: 130
Joined: Mon Jan 11, 2010 10:00 pm

Re: DIY Chrome kit

Post by Ismael Alvarado »

oK guy I finnaly was able to upload some pics, unfortunately my Chrome spoon was not the Best, poor weather and poor painter´s skills got me...

this is what I work with, I do not show the Final ClearCoat beacuse I am still working with it and I dont use Permalac I just put it there to show you that I tried to use it..but this kind of Permalac is not what its need it
Image

this is my Hand Made Silvering Gun, two cheap chinesse datail guns, the one on the left afew things were changed infavor of Stailess steel parts(SilverNitrate)
Image

anybody can do this
Image

this is how I start, white spoons prep and then Minwax clear polyurethane, the final product should not BE sand it or polished, it must be glass like, I like the self leveling properties of wood Polyurethanes
Image

this was my first attemp at Clearing the Silvered Spoon, but afew things went wrong... :(
Image

from left to right: Blue, the Bad Chrome attemp, Black Chrome, Copper and Green
Image

Blue Close up
Image

Green
Image

Copper
Image

Black Chrome
Image

Image


there is much to be learn and much to be improved, I wish if you are interested in this to contact me and will help each other... :wink:
Ismael Alvarado
Posts: 130
Joined: Mon Jan 11, 2010 10:00 pm

Re: DIY Chrome kit

Post by Ismael Alvarado »

it seems I have bring the attention to Angle Gilding somewhat by my threads and posts.... :mrgreen:


this is from the site(was not there before) http://angelgilding.com/SpraySilver.html
"Spray Silver reacts faster than Pouring Silver. Spray Silver is perfect for large mirrors, "spray chrome" and front surface silvering"
"Our Spray Silvering kit is also suitable for spray chrome applications"

http://www.rcgroups.com/forums/showthre ... 293&page=2
check post #55
http://www.jalopyjournal.com/forum/show ... 744&page=3

http://cs.scaleautomag.com/scacs/forums/t/93430.aspx

so far the Silvering its perfect, the problem I have its finding the correct clear coat, but I am still testing new clear coats, I just can't give up... :x
erik winkler
Posts: 1097
Joined: Sat Feb 23, 2008 5:48 pm
Location: Amsterdam Netherlands
Contact:

Re: DIY Chrome kit

Post by erik winkler »

Ismael,

You are still with it?!
I see in one of your posts that you used the permalac satin, why did you do that?
I think you should use the high gloss one....
Or what is the problem you have with these clears that you used?

Erik
Realizing we are in the 2nd renaissance of the arts.
Learn, copy and trying to improve...
Still in the learning phase ;-)
Amsterdam Netherlands
www.ferrywinkler.nl
www.schitterend.eu
www.facebook.com/Schitterend.eu
Ismael Alvarado
Posts: 130
Joined: Mon Jan 11, 2010 10:00 pm

Re: DIY Chrome kit

Post by Ismael Alvarado »

erikwinkler wrote:Ismael, You are still with it?!
I will Never give up... 8)
erikwinkler wrote:I see in one of your posts that you used the permalac satin, why did you do that?.
it was the only one that they had at the time, but I am not impressed with the overall durability of lacquers.. :x
erikwinkler wrote:what is the problem you have with these clears that you used?
I don't have access to the dedicated Spray On Chrome BaseCoat/ClearCoat systems so I am experimenting with Automotive grade systems, Enamels, Urethanes but so far they all fail within months, humidity gets to the perfect mirrors I work so hard to make, but I am not alone in this one I have made a few friends that are testing new paint systems and we are exchanging experiences to find the perfect paint system for outside automotive use(works good indoors)...

here is a friend that have used Spectra Chrome System and also their Paint System and have found them to be lacking also here a the pics... the Bumper was silvered and protected using the spectra chrome paint system, but system failed after 6 months....Not good... :x

Perfect mirror..
Image

just after 6 months
Image

have you had any good results yet?...


I am having good results with the Angel Gilding Spray Silver chemicals for indoors, but all the money and real good money its in Outdoors automotive applications...
erik winkler
Posts: 1097
Joined: Sat Feb 23, 2008 5:48 pm
Location: Amsterdam Netherlands
Contact:

Re: DIY Chrome kit

Post by erik winkler »

I can not deduct what happened after the six months...
How did it come off... in flakes or completely, was it appled thin, thick did you heat dry prior to lacking.
Evethough I have not tried this myself, I can imagine that you should heat-blw dry the whole shape just before applying the laquer. Eve one molecule of water will be stuck under the laquer layer and will start making problems immediatly...

Otherwise I need some more information to geuss more accurate.
What do the system suppliers say?

Erik
Realizing we are in the 2nd renaissance of the arts.
Learn, copy and trying to improve...
Still in the learning phase ;-)
Amsterdam Netherlands
www.ferrywinkler.nl
www.schitterend.eu
www.facebook.com/Schitterend.eu
Ismael Alvarado
Posts: 130
Joined: Mon Jan 11, 2010 10:00 pm

Re: DIY Chrome kit

Post by Ismael Alvarado »

erikwinkler wrote:I can not deduct what happened after the six months...
let me help you then, even if the part that was Silvered was not mine, I am having the same issue, Humidity got to the Silver, it happens a lot, seems that Clear coats are not meant to be applied over bare metal, just over base coats... :x there are ways to fix this issue or there are better Clear Coats out there, I am experimenting right now using the Old and tried iron Nail Corrosion test to determine how to completely seal the metal from humidity.. :wink:

I will post results when I have accurate results
erik winkler
Posts: 1097
Joined: Sat Feb 23, 2008 5:48 pm
Location: Amsterdam Netherlands
Contact:

Re: DIY Chrome kit

Post by erik winkler »

Use a hairblower/heatgun put it on maximum blowpower temperature 60 degrees celcius and then immediatly, when the silver is back to 37 degrees, clear coat it again.
Realizing we are in the 2nd renaissance of the arts.
Learn, copy and trying to improve...
Still in the learning phase ;-)
Amsterdam Netherlands
www.ferrywinkler.nl
www.schitterend.eu
www.facebook.com/Schitterend.eu
Ismael Alvarado
Posts: 130
Joined: Mon Jan 11, 2010 10:00 pm

Re: DIY Chrome kit

Post by Ismael Alvarado »

erikwinkler wrote:Use a hairblower/heatgun put it on maximum blowpower temperature 60 degrees celcius and then immediatly, when the silver is back to 37 degrees, clear coat it again.
WOW...I will have to try that....Thanks... :D
Anthony Bennett
Posts: 352
Joined: Tue May 11, 2010 4:50 am
Location: England
Contact:

Re: DIY Chrome kit

Post by Anthony Bennett »

Ismael Alvarado wrote:
erikwinkler wrote:Use a hairblower/heatgun put it on maximum blowpower temperature 60 degrees celcius and then immediatly, when the silver is back to 37 degrees, clear coat it again.
WOW...I will have to try that....Thanks... :D
Did it work for you Ismael, hows the diy chrome experiment coming along?
Post Reply